Making Sylveon

The original design sketch for Sylveon.
Sylveon was the third cosplay I fully made myself. She was made to be a part of an Eeveelution group cosplay for PAX East 2024 with my friends group, and her design was dreamt up while working as a sub in August on 2023. A lot of inspiration was drawn from Lolita and Rococo fashion for my design. I knew I wanted short skirts with numerous layers, tons of lace, gratuitous bows, and lots of pink. I also knew that I wanted a wench style bodice in my design. Thus, this sketch was born!
I wasn’t sure how many of these elements were going to make it into the final design, but I knew I wanted to incorporate as many as I could.
The very first part of this project that I tackled was the petticoat. I had some poly-cotton broadcloth inn white that I made a half circle skirt from with a drawstring waist band, and made strips of tulle in gradually increasing heights. I had found some bulk rolls of colored two inch ribbons at Goodwill, and so on one side of the tulle I stitched the ribbon. The other side of the tulle strips was gathered down and stitched to the half circle skirt, with the layers spaced a couple inches apart as they went up the skirt.
While my hems didn’t end up completely level, I loved the effect the alternating pink and white ribbons gave to the hem, and the weight and swish it gave to the petticoat. The layers of tulle also helped give the petticoat much needed volume.


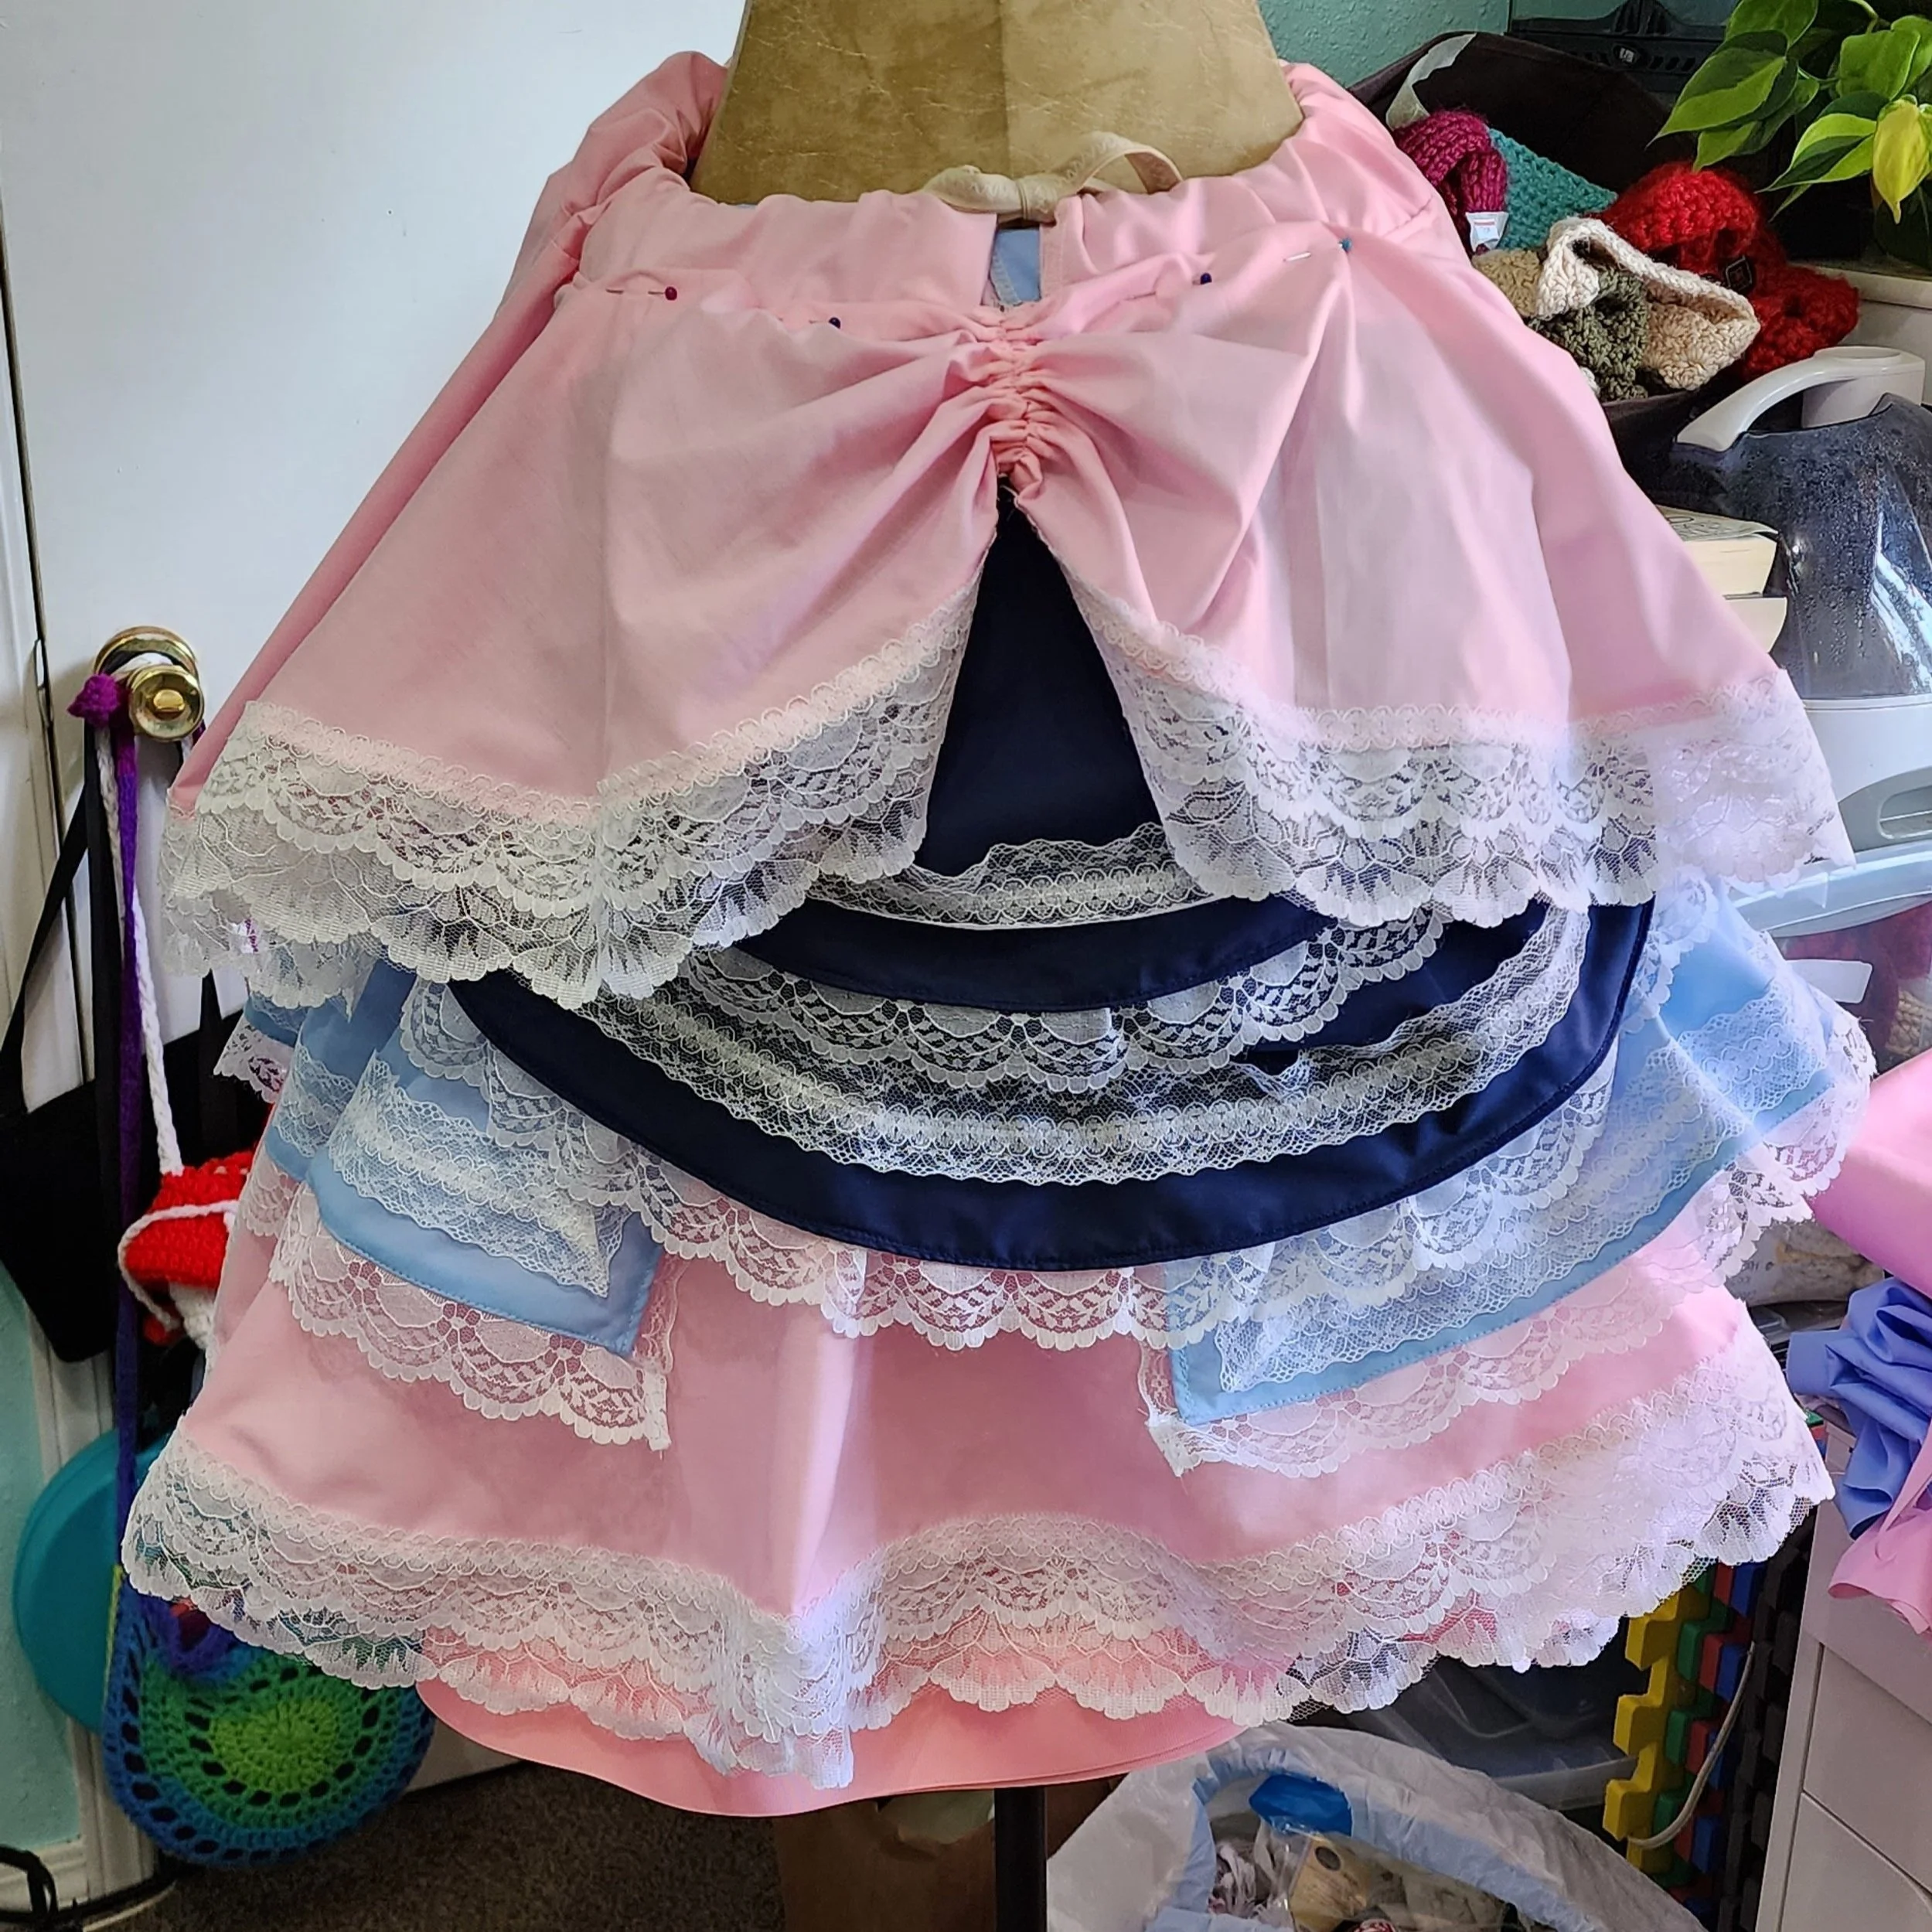
Once the petticoat was finished I dove into the skirts. I ordered in three different coiors of poly-cotton broadcloth from Big Z Fabrics for the main body of this dress, and that is what I used to start making these skirts. I also ordered in a variety of different sizes of laces from Temu. Overall the skirts were very simple to make. The bottom layer is made with a light pink, and is a full circle skirt with a drawstring waist band. I layered two different scalloped laces on the hem, with a third 1/2 inch lace across the top.

For the next layer I made a second full circle skirt in a shorter length out of the light blue and layered it over the pink skirt. At this time I did not have a dress form, so I used an old lamp as a stand to layer the skirts on while working on them. While the light blue skirt was laid over the pink I cut open a gap approximately the same as my design, and hemmed it all around, and layered on several different laces. A scalloped 2 inch lace on the bottom hem, a 1/2 inch scalloped lace on the front horizontal hem, and a 2 inch flat trim with a centered 1/4 inch trim offset from the edge all the way around. With that the second skirt was complete.

The next part of the design was the dark blue doubled half circles. To make these I ended up measuring how far down I wanted each half circle to sit on the skirts and used that as the radius to cut out two circles. I folded those in half and top stitched all the way around, and added the same 2 inch flat lace and 1/4 inch lace centered on it offset from the edge of the half circles. I then ran a gathering stitch along the flat top edge of each of the half circles and gathered them down so that they would fit across the front of my skirts. The plan for these was to have them become a single piece with the final layer of the skirts so that they would always sit in line with them.
The final skirt layer to be made was a gathered light pink layer, mean to look somewhat like a peplum. To make this layer A final full circle skirt was made, this one long enough to almost full cover the light blue skirt from the back. Then the front of the skirt was gathered up the middle allowing it to swoop down and around towards both sides. To help with the illusion several folds were lifted and stitched in place to help hold the fabric in place. The dark blue half circles were centered on the front of the skirt, and the while piece was sewn onto an extra wide drawstring waistband.

Once the skirts were made I began the process of making a large number of small Sylveon bows. The bows were assembled from several pieces. The top part of the bow was a white rectangular piece, a smaller pink rectangle, and then a pink band wrapped around them. The tails were assembled by sewing together strips of white, pink, dark blue, and light blue together, sewing them together inside out with the V-shape in the light blue, cutting out the V-shape, and turning the tails right side out. Lastly two of these tails were hand stitched to the back of each bow. These bows were spaced around the hem of the top most skirt, and at one point I’d considered using one at the center point of the gathered point at the front center.


The next piece that I made for this cosplay is the blouse to be worn. I used a tutorial on YouTube, however I cannot seem to remember or find it any long! It basically helped you figure out the size of what rectangles you need to make a “pirate” shirt based on your body measurements. I made my blouse out of the same pink fabric I used on the skirts, and elasticated the top line so that it could be worn both on and off the shoulders. I also added layered lace around the cuff edges (which are also elasticated) and the 1/2 inch scalloped lace around the neckline.
At first that was the only embellishment that I did to the blouse, but after trying it on I decided I wanted to do even more. So with a bit of fear and can do attitude I attacked my sleeves with scissors and cut two large cut outs in each sleeve, which I them hemmed to prevent fraying. I used the same 1/2 inch scalloped lace around the openings, and had my first big breakthrough with this design. Pearls! I had snagged a bag of mixed sizes and colors of white, off white, and light pink pearls on sale at Joanns and this project was just screaming for them. So during a DnD session one morning I sat and stitched random varying sizes and colors of those pearls all around the sleeve openings of my blouse. Lastly, I tacked three bows on each sleeve, one at the top of the shoulder opening, the center between the two openings, and one at the wrist. At that point I was happy with how the blouse looked.

After finishing the blouse and skirts I threw together a quick, large bow, embellished with a small amount of lace, and decided that worked better as a central from bow than the smaller bows I used as decoration on the hem. It was at that point I also decided I needed pearls on more than just the sleeves of my blouse. With that I added pearls along the top of the lace for the top layer pink skirt. I also added periodic pearls all over the skirt layer. I also added pearls along the center of the lace on the dark blue half circle layers and added stitching to hold the edges of the lace trim down and flat so it all laid nicely. Once that was complete I was much happier with the overall appearance of the skirts.

Throughout the process of trying on the cosplay I had been testing it with a previously made bodice I had, and I liked the look of it. The downside to it was that I had lost weight since it was made, and so it no longer fit the way I wanted it to, and the pattern I had purchased was a singular size. No problem, right? I’ll just tweak the pattern and make it smaller? (The pattern is the Autumn Stays by MeadowPatterns on Etsy btw)
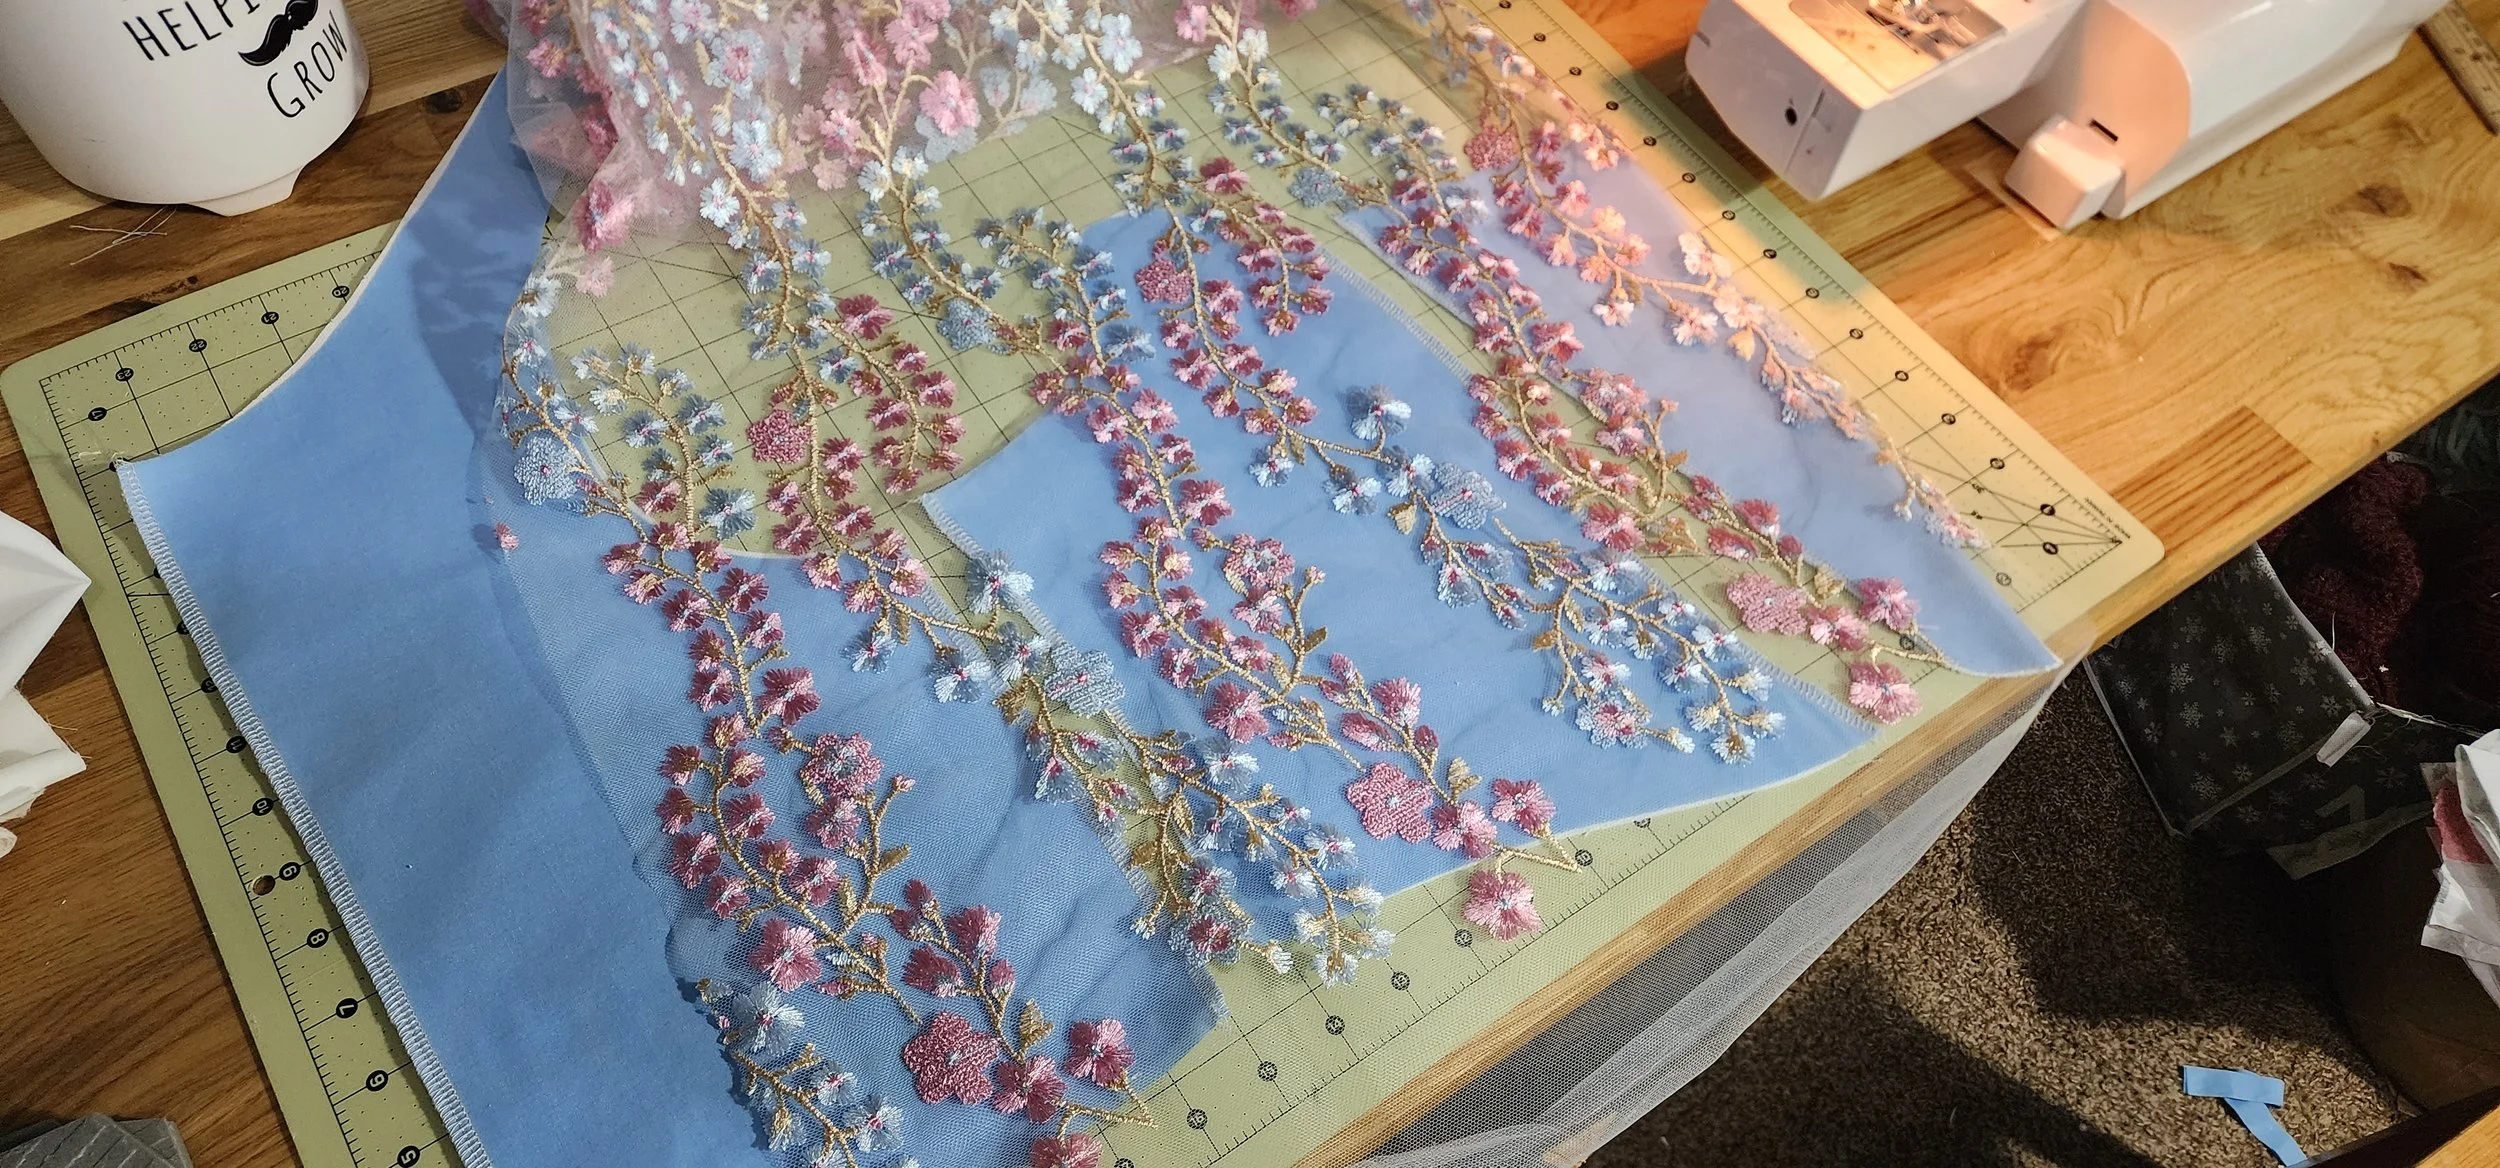
I had also come across an embroidered tulle on a random trip to Joanns that just screamed SYLVEON DRESS to me, so on a whim I purchased a yard of it (this is probably some of the most expensive fabric I have ever purchased since my wedding at $25/yard). So, convinced that I knew exactly what modifications I needed to make to the bodice pattern to make it fit, I got to work right away. To start off I cut my pieces from the light blue poly-cotton and a duck cloth lining. For each set of these I serged the edged together (just the side edges, not the top and bottom) so that they behaved as a singular piece of fabric. Once these pieces were serged together I assembled the bodice, and them laid the tulled over the top and began cutting out motifs to get the best use of the tulle overlay.


Once it was assembled and the tulle was in place, I took the flowers off a sprig of faux cherry blossoms and stitched them on various parts of the bodice with pearls to tie it into the skirt and blouse design and fill in some of the empty spacing between tulle motifs. I inserted heavy duty zip ties in the boning channels, for many of my early corsets and bodices that is what I used as it was inexpensive and worked well. I bound the edges of the bodice with light blue bias tape, first by stitching it right sides together, then flipping it over and hand stitching it down on the inside to give it a clean finish on the front. I also used metal eyelets on the tabs and straps, and along the front edges for lacing holes. It was at this point that I realized that my sizing modifications were not quite up to snuff, and there was quite a sizeable gap in the front of the bodice.
To remedy this I designed and cut out a modesty panel from the pink poly-cotton and some duck cloth and ran a large number of boning channels throughout it. Once the boning channels were finished I layered tulle over it, inserted zip ties, and bound the edges with the same light blue bias tape. To assist with putting this bodice on I chose to full stitch one side of the modesty panel into the bodice. On the other size I added a skirt hook and bar to the top and bottom of the panel to hold the panel and bodice together while I laced the front up. This could then be unhooked when I was ready to tighten the lacing.

The next piece I made was the head bow. I used the same bow design as I used for the skirt front. A large white rectangle with a slightly smaller pink rectangle with a strip of lace, and a pink center wrap. The biggest difference were the extra long tails like the ones Sylveon has that flow around her. My idea for these was having wire in the tails so that they could be posed to look as if they were blowing in the air around my head. This was a bit of a challenge.
In the end I accomplished this by making the tails in the same way as the smaller bows, just bigger, with the white portion being extra long. I then made a frame from bonsai wire I had in my plant supplies. This wire was heavy enough to hold the weight of the fabric and it’s shape, but maleable enough to manipulate and change shapes as I pleased. Once I made the tails I slipped this “frame” that was made in the shape of the tail inside and made some strategic stitches to help hold it in place and prevent the fabric from slipping and sliding off of the frame when the tails were manipulated. The top inch or so of the tails were sewn together side by side, and the bow mounted above them. For structure a small bit of cardboard was glued behind them.
The last challenge was figuring out how to get the bow to stay on my head, especially if I wanted the tails to sit in difference positions on my wig. The solution I came up with was wig clips. These are small comb clips that can be sewn onto things, and I had quite a few on hand as I had sewn several inside my Caitlyn hat from Arcane to keep it on my head. One was sewn on the back of the bow, and one each on different parts of the tails to help them clip onto the side of my head. In this way the bow could be worn like a head band, and the tails could be worn loose and manipulated to flow around me.

For the ears and tail I had ordered some pink stretch velvet from Big Z Fabrics. Thankfully it ended up being a near perfect match for the pink of my poly-cotton. With some wrapping paper I sketched out various ear shapes and sizes until I made one that was the right shape and proportion for me. This was traced out onto form floor mats from harbor freight and cut out (just with a box cutter, at the time its all I had). To help with texture I glued some thin batting to the foam.
I used the same pattern to cut out four pieces of the velvet and stitched those together on my machine right side together like a pillow case, leaving just the bottom open. Because it was a stretch velvet I was able to carefully pull the fabric over the ears and had a tight fit. For the center of the ear I used hot glue to attached some of the dark blue poly-cotton from the skirts.
Disclaimer: These ears are far from perfect, and I plan to remake them. There are visible permanent marker lines on the fabric from marking my pattern, the stitching is wobbly, and the foam is bumpy and uneven, but they worked really well for my first attempt!
To attach the ears I glued two strong neodymium magnets to the bottom of the ears and then stitched the fabric shut over them. Then, corresponding magnets were attached to a headband which is then worn underneath my wig. When I redo these ears I plan to use three magnets instead of two for a much stronger fit, and I plan to make sure that the magnets are covered on the headband as well. The last time I wore Sylveon I didn’t realize one of the magnets had detached and was left behind and I nearly had a breakdown because I couldn’t figure out why I couldn’t get my ear to attach and stay on.
The tail is made in the same fashion, but instead of having corresponding magnets, a screw plate was hand stitched onto the back of my bodice, and the tail snaps onto that. This method works great for the tail snapping on and off quickly, and makes it easy to sit in chairs and go to the restroom. It also, unfortunately, made it easy to lose the tail the very first time I went to a convention alone in this cosplay. My tail was never found. At least I plan to remake it, but I do intend to add a safely line to catch it is it unintentionally falls off in the future.


At this point I felt like I wasn’t getting the amount of “cupcake” fluff out of the skirts I was wanting. I had a vision for the cosplay and I wans’t quite achieving it. So, rather than attempt to gain that volume with even more petticoats, I decided to attempt to make my own hoop skirt. I had just watched a video recently by Sarah Spaceman where she had made her own short hoopskirt for a cosplay, and she had released her pattern for free. The process seemed easy enough, and I was certain that it would give me the look that I was going for. I also had plenty of white poly-cotton laying around the use for the project. So, with freshly ordered flat steel boning, and heaps of optimism, I followed her tutorial and came up with a mostly functional hoop skirt (Through no fault of Sarah Spaceman). With the hoop skirt and petticoat my ultimate cupcake dreams were achieved! It did unfortunately lead to a different set of problems.
I have found, now that I have used this skirt MANY times, the electrical tape I was originally using the secure the loops of steel hoop together and prevent them from slipping back into the fabric channels isn’t cutting it anymore. So I am looking into alternate means of securing these. Originally I was thinking I wanted them to be detachable in case I needed to remove them or break it down, but now I am looking into a more permanent solution.

With the hoop skirt I was left a little exposed. Being a shorter skirt any bending over left all the goods under the hood available for the world to see. To combat this issue I recalled my initial idea of a pair of bloomers to wear under the cosplay. I looked into a lot of designs and patterns, and ended up choosing a pattern by DRCOS. They are a Japanese pattern maker that creates a lot of free patterns, I have used quite a few patterns from them since I started making cosplays and I highly recommend them if you don’t require instructions for making garments. I used their “Drawers 2” pattern which is available for free on their website. I did modify it to my needs/wants, but used their pattern overall. I used the white poly-cotton I had left over, and made it elasticated at the waist and leg openings. I also used some left over scalloped lace from the skirts around the edge of the “skirt” It is a very versatile undergarment, and is very cute. The only downside is the poly-cotton I used is very thin, which leads to these being slightly see-through.

The last piece I made for this cosplay was a choker. This was a fairly easy piece to make. I stitched some of the light blue bias tape I used to bind the bodice together and cut it to my neck length, then as a clasp I used a bow tie closure. I layered some lace under it, and stitched on a bow in the center. Then I strung a bunch of the pearls used in the cosplay and layered them in a tiered design, sewing each end directly to the bias tape “choker” to secure them.
This cosplay was a lot of work, and was created over the course of 5 months. She was a labor of love and she is well loved! There are some things I want to upgrade, like her ears and tail. I also found the original shoes I purchased are a half size too small, so I want to purchase them up a size so that I can wear them to conventions again because they work so perfectly with the cosplay. Since making the cosplay I have combined all but the bottom most skirt into a single waistband to ensure that they always sit in the correct position, and my poor Sylveon tail is gone until a new one is made.
I learned a lot making this cosplay, and I’ve made so many cosplays since and have so much still to learn. Even with being one of my first she still holds a frequent rotation in my cosplay lineup. I hope you’ve enjoyed learning how I made this cosplay, and if you have any questions please reach out!
